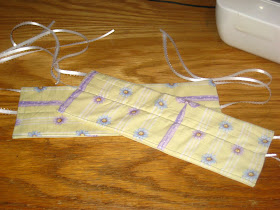
This mug cozy is designed to go into the microwave with the
mug. This should keep hands from being burned.
There is nothing shiny or metallic in or on the fabric or batting.
Ribbons were used instead of any buttons just in case there was a problem with
the button in the microwave.
Measure the width around the mug. This measured almost 10 ½ inches.
So the length of the fabric will be 11 ½ inches.
Measure the height of the mug. This one measured almost 4
inches. So the fabric will be have a width of 4 ½ inches. I’ll still use the
one inch seam allowance, but this will allow a little bit of the mug showing above the
fabric.
Use the mug as a template. Trace around the base of the mug
onto the batting. (Because this batting will go into the microwave, DO NOT USE any insulated
batting. Use only 100% cotton batting.) Cut approximately ½ inch bigger than
the traced circle. Cut one for each cozy. (Use two if you feel that you will
need the extra batting for heat protection.)
Cut batting to fit the exact measurements of the mug. Do not
add seam allowances. This reduces bulk as you sew. For this project, I cut only one rectangular section of batting. If you feel that you need to, cut two for added protection for your hands.
Cut two (inside and outside of the cozy) pieces of rectangular strips of fabric the circumference of the mug by the height of the mug. For the mine, I cut the
strips 11 ½ by 4 ½ inches.
*I made two cozies. So if you look closely, you will see 2
each of the batting and 4 each of the fabric sections.
Pin and quilt batting into place onto the wrong side of one
of the corresponding fabric pieces. I cut the circles out with seam allowances later
in the tutorial.
I did a very simple quilting job, just enough to keep the
batting into place. For the rectangular pieces, I quilted three lines. (Top,
bottom, and middle of the batting.) For the circles of batting, I quilted an “X”
and then around the circle on the traced pattern to keep the batting in place.
Place the quilted pieces onto the corresponding fabric pieces wrong
sides together. Pin in place.
Start with the circle batting. Sew three quarters around the
circle leaving an opening so it can be turned inside out. Allow 1/8 to ¼ of
space between the stitch line and the edge of the batting. This reduces bulk
and makes for easier manipulation of the pieces.
For the rectangular section of fabric, sew alone the top and
bottom with ¼ of a seam allowance. You should not catch the batting in this
stitch. Again, this reduces bulk and allows for easier manipulation of the
fabric.
Turn the circle piece inside out. Fold the fabric in the
open edge so that it conforms to the circle, press or iron so the fabric stays
folded. Tack with glue or pin the fabric into place to complete the circle.
Turn the rectangular piece inside out. Fold ¼ inch under at the
opening so that you will have a finished edge after sewing. Do not sew at this
time. You will need to add the ribbons first.
Add ribbon at the top and middle of the cozy. You may wish the ribbons to be longer than you think that you might need. You can trim them later. These will tie
the cozy closed and keep it wrapped around your mug. Tuck the ribbon between
the folded edges at the ends of the cozy. Make sure that you are placing the
ribbons at the spot that will be the top and middle. Tack or pin into place.
Sew the ends of the cozy closed with 1/8 inch seam allowance
making sure to secure the ribbons in place with the stitching.
Secure the ribbons out of the way so they will not inadvertently
get caught and sewn into the wrong places. I used a binding clip and secured
the ribbon to the top section of the cozy.
Pin the circular bottom to the cozy wrap section with the outside sections together. Think about what you want to see on the outside of the mug.
Then make sure that section of the bottom and the side are facing each other
as you sew. Sew into place.
Turn the cozy inside out. Now the fabric sections that you
wanted outside should be facing outside. Tie knots on the edge of the ribbons
to prevent unraveling. Trim the ribbons now if you wish to do so.
The cozies are now complete. You have a cozy that wraps around the sides and bottom of your mug and prevents your hands from getting burned.


No comments:
Post a Comment