Showing posts with label recycling. Show all posts

The Pouring Jar


This tutorial will show you how to convert a canning jar into a jar that pours. This was not my idea. This was the idea of Rachel Bush and I wanted to share it with you.


You will need:


- a canning jar. In the photo is shown a wide mouth half gallon canning jar. If you use a small mouth jar, you may find that you can skip some of the steps. Also, you can use different size canning jars. Since they tend to use the same size rings, you can move your contents to different jars at later times if you need a different size.

-a salt box or other cardboard box with a pour spout.

-hot glue gun


Start by opening the salt container carefully. Using the lid of the canning jar as a template, trace around the lid on the side of the box so there are no fold seams. Also, trace around the spout.
In the photo above, notice that the spout section doesn’t cover a complete circle. That is okay. 

*If you use a small mouth jar, you may only need to trace carefully around the spout. You might be able to skip the prep of the circle section of cardboard completely. Just make sure the spout has enough cardboard to make a snug fit so the contents don't spill out and that pests cannot get in.


Cut out the circle and the spout. They will be too large to fit into the canning ring. Trim the circle section carefully until it will snap into the ring section. It should not fall out or be too loose. To check, add a teaspoon of salt (or whatever will be kept in this jar) and tighten the ring with the cardboard in place. Turn the jar upside down. None of the contents should fall out. This will help prevent pests from getting into your jars. 

Gently remove the circle so the spout section can be cut.

*Leave the salt (or other contents) in the jar. You will use it to test the seal later.


Measure the spout. This one measured an inch and a quarter tall (include the cardboard section below the spout.) It was about three quarters of an inch wide. Mark those measurements onto the back of the circle cardboard section.


Cut out the section. Then mark the glue line. I left plenty of space between the cut section and the hot glue mark.  I wasn’t sure how it would fit. Next time, I won’t use such a wide space.

Glue along the lines and affix the spout so it is facing out. In this tutorial, it won’t matter if the spout opens on the colored part of the cardboard or the back.


I had the spout so that it poured so you could see the blue color of the salt box because this canning jar will hold salt. Next time, I may have the cardboard section facing out and write the contents of the jar on the cardboard.


 Insert the circle cardboard section back into the ring of the canning jar. Then screw the ring onto the canning jar. Keep the spout closed and turn upside down. (You should have left the salt in the jar, if not, add a teaspoon back into the jar.) You should not have any leaks. This helps prevent pests from getting into the jar.


Now you have a pouring jar.

Portable Ironing Pad Tutorial


Here is a tutorial on how to create your own portable ironing pad. This is for those smaller projects that you don’t need a full size ironing board.  This also recycles an old car sun shield.


For this project you will need:
Fabric
Insulbright or other insulating batting
Extra regular batting
A car sun shield with a center of foam, not the bubbles.

First determine how big you would like your pad to be. I decided to have one for my quilting blocks.  So I wanted 17 X 22 inches. Cut the insulbright and batting to 17 ½ inches by 22 ½ inches.  Cut the fabric to 38 X 23 inches.


Press 1 inch fold on the 17 ½ inch sides. Then fold over another 1 inches on each of those sides. Iron and sew. This will give you the finished edge after everything is sewn.

Lay the insulated padding against the wrong side of the fabric. Make sure to position the padding so that it will be in the correct position after the other side is folded over so the finished edges meet.

Then place the other batting over the insulated batting. Pin and quilt both battings into place.


Fold the fabric in half so right sides are together. Pin marking the 17 1/2 inch side to remind you NOT to sew them shut. I differed the pin positioning and also added red pins to remind me not to sew that side shut.  

Sew the other three sides. I did add a line of stitching on the fold to ensure that the batting stayed in place and didn't creep in future use.Trim away excess bulk.


Turn the ironing pad inside out. Slip the car sun shield inside making sure the shiny side is facing up. This will prevent steam from getting to your table. 

I suggest that this side be left open so you can remove the sun shield for washing or if you need to add a different sun shield after wear and tear. If you really feel the need to close it, then I suggest using a few tacking stitches that can easily be removed.


Now you have a finished ironing pad that you can use on a table or desk for smaller projects. I have washed this on gentle in the washer and it has held up fine. I will safety pin the open side closed next time, though because a sock got trapped in it.

Sweatshirt Tote

My niece didn’t want to give up her favorite sweatshirt, but she had outgrown it. So, we turned it into a tote. The tote is longer than I what I am used to, but my niece did not want to lose any of the image on the front of the sweatshirt.

Supplies needed:
Sweatshirt (makes the outer pocket of tote)
Rectangular fabric 43 inches by 15 inches for outside of inner tote.*
Rectangular fabric 43 inches by 15 inches for lining of inner tote.*
Rectangular batting 41 inches by 15 inches.*

*If only the sweatshirt is used for a simple tote, then only the lining fabric will be needed.


If my niece hadn’t been so insistent, I would have made a straight cut across the top. Instead, I trimmed the top in order to preserve the image. Then I made straight cuts on the sides trying to square up the front of the sweatshirt as much as possible.

 The back was easier. I made straight cuts across the top and down the sides.
We turned her sweatshirt into a three pocket tote. We used black fabric because it matched the outlining on her sweatshirt. After measuring the sweatshirt sections, we cut a piece of rectangular fabric seven inches longer than the top to bottom measurements of the sweatshirt front and the measurements to the top and bottom of the back section of the sweatshirt section.

My niece’s sweatshirt front (measured 19 inches by 15 inches) and back (measured 17 inches by 15 inches) 36 inches by 15 inches. We add 7 inches to the length making our black cloth 43 inches by 15. We also cut a section for the lining (also black) with the measurement s of 43 inches by 15 inches.
Cut batting 41 inches by 15 inches.


Pin batting in the center of the rectangular fabric. Then add the lining fabric on top of the batting. The layer can now be quilted together.


I sewed straight lines to quilt the layers together and even a line to secure the edge of the batting on all sides of the fabric.
Sew bindings on the tops of the front and back of the sweatshirt sections to get a finished edge.

Fold the rectangular fabric layers in half so that the measurements are 26 ½ inches by 15 inches. Press or mark a line on the fold. Measure 2 ½ inches from each side of the fold line and sew the sweatshirt bottoms to each line.

Fold so the sweatshirt pieces are facing each other and pin. Sew up each side. You now have secured the sweatshirts as pockets to the front and back of the tote.
Sew the triangular tips of the bottom of the tote to square off the bottom.
Cut off triangular tips.


Make the handle. My niece wanted one long handle that she could throw over her shoulder. To make a long strap, a strip of fabric was cut 44 inches by 4 inches. Press in half. Open. Fold the sides to the center and press. Now, you can fold so that you now have a strip of fabric that measures 44 inches by 1 inch.


Before attaching the strap, fold over the top of the tote ¼ inch and press. Fold over ¼ inch again and press.


Sew around the edge of the top to secure in place.


Pin the handle over the seam edges. Sew by hand or machine in place. I sewed by hand because it was very bulky.


Turn tote inside out and you now have a finished tote.

Pin Cushion Tutorial


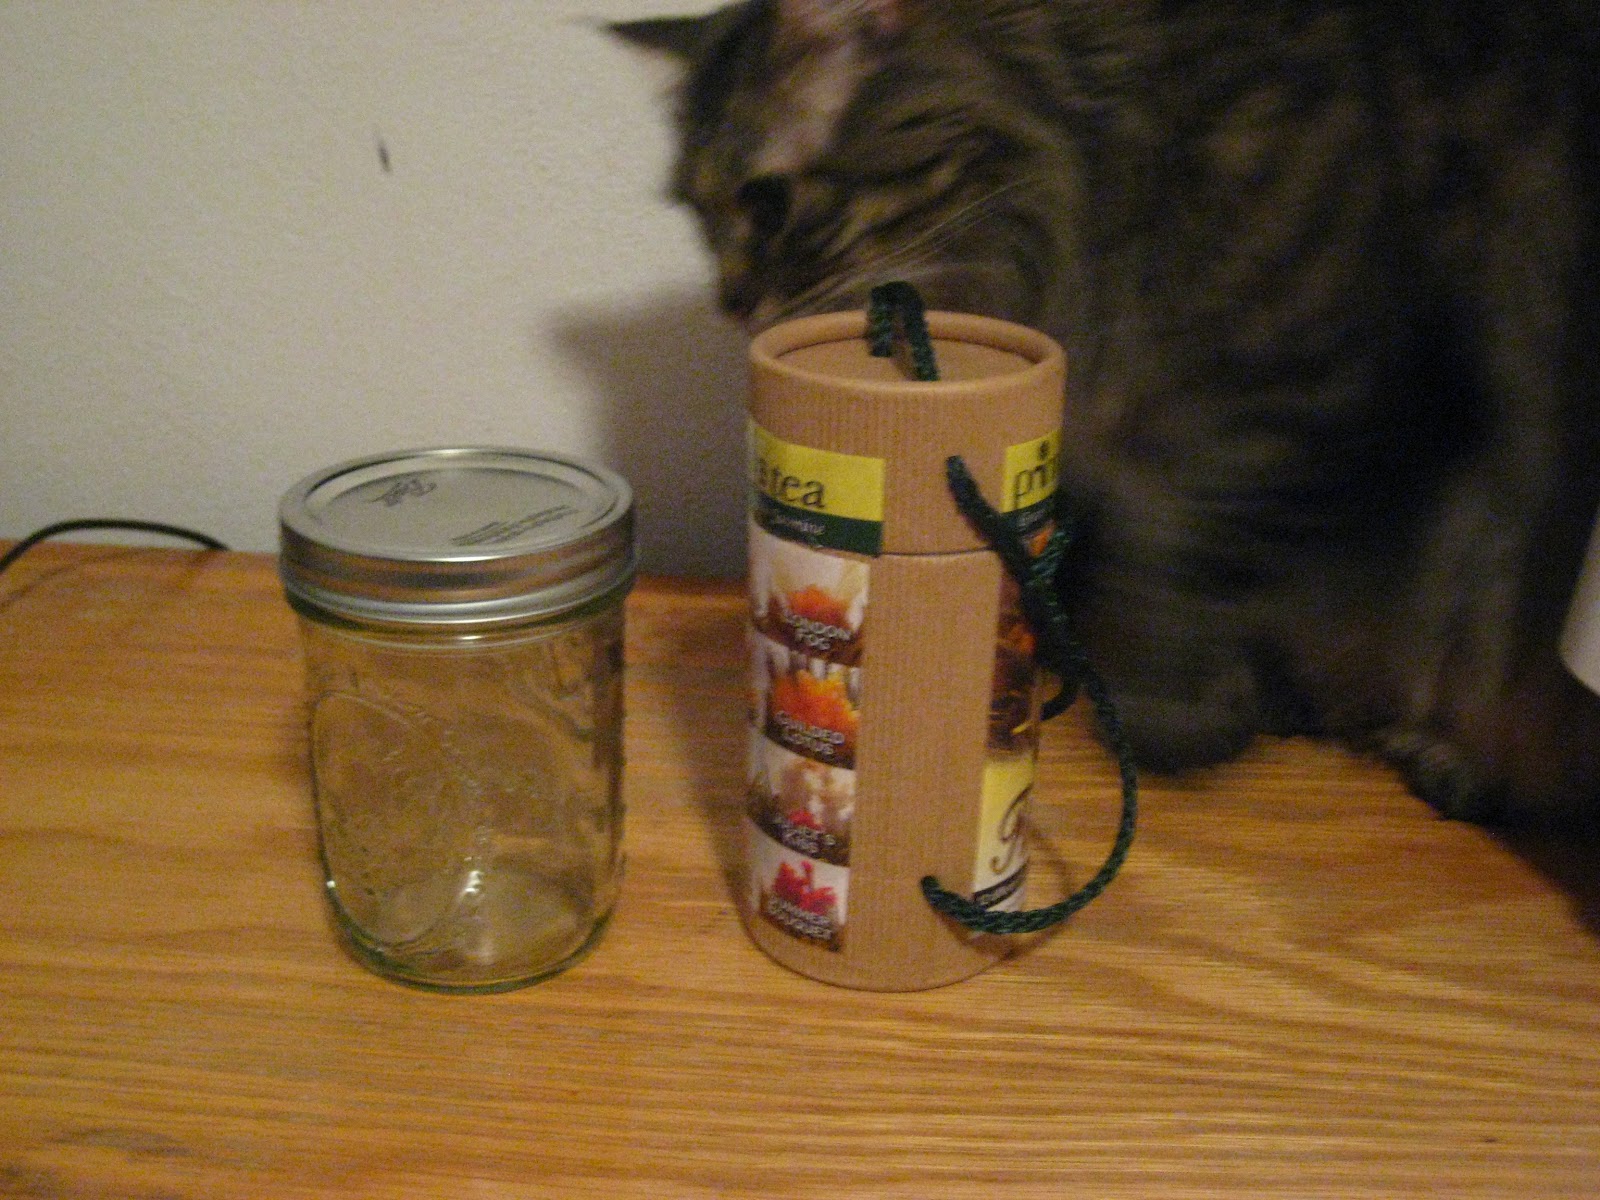
Here are two pin cushions. The one on the left is a simple pin cushion hot glued to a canning jar lid. The open one on the right is made by recycling a tea container.

Prepare and clean the containers. Rubbing alcohol helps remove any residue that would prevent glue from sticking on the canning jar lid. Peel off any paper from the tea container or whatever container you may be using. Cut off any strings.
The first part of the tutorial will focus on the canning jar because it is a simpler pattern.

 
Part 1 - Canning Jar Pin Cushion Tutorial:
 
Use the lid to trace the pattern for the bottom of the pin cushion. Do not add a seam allowance. After sewing, there should be a border of the lid visible surrounding the pin cushion. The visible strip will allow the ring to fit over the lid and close the jar.

For the dome of the pin cushion, mark a circle about twice as big as the base of the pin cushion. I was able to find a plastic lid that worked. If you are having trouble finding something, you can use the string method.
String Method: Measure a string the width of the lid. Pin or tack the string in to the material. Attach a pen or pencil to the other end. Draw a circle around the pinned end of the string.
 
Now you have a small circle and a large circle for your canning jar.

Press the circles.

On the large circle, sew a zig zag stitch over thread or dental floss to create gathers. Sew around the edge of the circle. Then pull the thread/floss to create the gathers.

Gently use your fingers to move the gathers evenly around the larger circle. Continue to pull the gathers until the opening of the large circle matches the size of the small circle.
Pin the large circle to the small circle, right sides together. Sew. Remember to lock your stitches and to leave an opening so you can turn the pin cushion right site out.
 
Stuff the cushion with cotton stuffing or whatever you prefer. (Sand, walnut shells, fabric scraps, yarn…) Hand sew the opening closed.
 
Whenever I knot my thread, I insert the needle one last time into the fabric at the base of the knot and exit the needle anywhere from half an inch to an inch away. Pull the thread through and trim where the needle exits to keep the thread tucked neatly away.

Glue the pin cushion to the bottom of the canning lid. Notice the rubber seal is visible. That will allow the ring to secure the lid to the top of the jar.

The rubber seal is no longer visible when the ring is added. The pin cushion can also be turned so it is inside the jar for child or pet safety.

Glue lace around the outside of the ring so it is standing up. Make sure you do not get glue inside the ring or it may prevent the lid from screwing onto the jar.

Now, glue lace around the ring so it is hanging down like a skirt.

Glue a ribbon around the ring to cover the lace seams. Tie a bow or glue a bow onto the ribbon for the final touch.
 
The pin cushion can be turned so it is inside the jar. The printed words on the top of the lid should be visible. This gives a better seal. If you don’t like the look of the plain metal lid, you can decorate it with fabric and notions. 

 
Part II - Tea Container Pin Cushion Tutorial:

Use the lid for the pattern. Trace five circles.   

The dome of the pin cushion should be about twice as wide as the base. I used the same plastic lid.

Measure the lid height. Add an inch to the measurement for seam allowances. This lid measured approximately 1 ½ inches. The fabric was cut to 2 ½ inches.

Measure the bottom of the tea container and add an inch. This one measured about 4 ½ inches so the fabric will be cut to 5 ½ inches. Do not include the white lip in the measurement for the fabric. It needs to remain bare so the lid will fit.

Measure around the container and add an inch. This one measured almost 10 inches. The fabric was cut at 11 inches.

The fabric pieces you should have are: 1) A piece for the bottom of the container. 2) A piece for the top of the container. 3) A large circle for the dome of the pin cushion. 4) A small circle for the bottom of the pin cushion. 5) Two circles for the top of the container. 6) Two circles for the bottom of the container.

*Remember, you should have a total of five small circles. The picture looks like it only has three. Two are under the other circles.

On the large circle, use a zig zag setting to sew over a long piece of thread or floss to create the gathers.

Use your fingers to move the gathers evenly along the thread/floss. Continue making gathers until the dome has an opening that matches the size of the base.
Pin the bottom of the pin cushion and top of the pin cushion, right sides together. Sew leaving an opening for turning. Remember to lock the stitches.
Turn the pin cushion right side out and fill with stuffing. Use your favorite. Then hand sew the opening closed. After knotting the thread, you can insert the needle at the base of the knot and exit the needle ½ to 1 inch away. Clip the thread where the needle exits to keep the loose ends tucked away.

Glue the pin cushion inside the lid of the container. Only add glue to the bottom of the pin cushion or the inside of the top of the lid. The sides need to remain glue free so the lid will still fit onto the container.

The fabric to cover the side of the lid for this tea contain measures 2 ½ inches by 11 inches. Press a ¼ inch seam along the 11 inch side.
The fabric to cover the side of the bottom part of the tea container measures 5 ½ inches by 11 inches. Press a ¼ inch seam along the 11 inch side.
 
You can sew the seam flat at this point if you find it easier. I chose to wait to sew the seam.

Fold both fabrics right sides together so that the 11 inch length is halved. Pin and sew with a half inch seam allowance.

Sew the circles right sides together along the traced line. Complete the circle so there is no opening.

The fabric for the lid and bottom should now look like a tunnel. Press the seams open. Then pin the pressed seam for sewing. Sew to finish the edge.
 
Cut slits into one side of the circles. Turning right sides out. Be careful not to cut the other side. Trim excess material from the edge.

Turn circles right side out. I use a wooden skewer to make sure the edges are fully pushed out. Press with an iron.

I had quite a bit if trouble getting the outside to fit correctly over the tea container. Finally, after many tries, I was able to sew the outside loose enough to fit over the container. It was looser than I would have liked, but with all my previous problems, I decided to keep it this way. Because it was a little loose, I glued the lace on first to make the fabric a little snugger. Then I added the “tunnels” of fabric and hot glued the seams over the lace.
Feel free glue the fabric first before the lace. Do whatever works better for you.

Hand baste thread about ¼ of an inch from the raw edge. Then pull to create gathers to fold the material over the edge. (Much like English paper piecing.) Make a knot to keep the material over the edge.
 
To finish the lid, pin lace around the raw edges. Lay one of the circles over the lace and pin in place. For the bottom, lay the circle over the raw edges and pin in place. Hand sew to finish.
*The lace and circles can be glued into place instead of stitched.

Add red ribbon where the fabric meets the lace and you are finished.

When the lids are on correctly, the pin cushions are hidden away in both containers.

The finished pin cushions will hold scissors, thread, or other items for projects.