Pumpkin Carving

 I carved pumpkins again this year. I used a Drummel tool with the carving bits to do my pumpkins. 

 This one is supposed to be a dog. I traced a photo of one of our dogs, but I had trouble. The tracings either looked like a teddy bear or a pig. I tried several times and then decided this would have to do. 

 I found this pattern on Pinterest. After I finished carving it, I dropped the pumpkin and the mouth area fell off. I had to fix it with toothpicks. You can see one of the toothpicks if you look closely. 

 I used a photo of one of our cats to make this template. This is my favorite pumpkin this year. 

 This is the photo that I traced of our cat, Mystique. Not all her tabby coat markings are on the traced paper, but this gave me a good starting point. 

 This is the cat template. I used an Exacto knife and cut out the carving areas. Sewing pins tacked the paper onto the pumpkin and I marked the lines with a red Sharpie fine point marker. Notice that not all my lines meet. 

 Last year, my hands were sore trying to scrape out the pumpkins so that the Drummel tool could cut deep enough for the light to show through. This year, I ordered this from Amazon. It was much easier and a lot quicker to scrape down the pumpkins. 

Gift for Niece

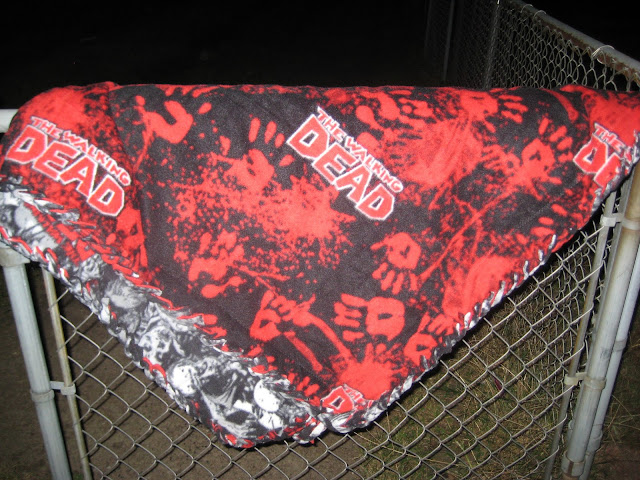
 This is a fleece blanket for my niece's birthday. She wanted zombies. I used a tutorial from the internet making scalloped edges, faux braids. When I took a close up image of the braid, the details got lost in the colors. 

It is supposed to be a no-sew pattern, but I used a walking foot and a zigzag stitch to secure the edge of the blanket about half an inch from where the braids start. 

 My niece's birthday is in December and this is now ready. 

Butterfly Quit progress

Here is the progress of the butterfly quilt. I still need to add a border before I work on the back. 

Butterfly Block

This is my butterfly block. It is applique. The head and body are trapunto. I hand stitched the head and body onto the green butterfly fabric. I used a simple chain stitch to connect the antenna tips to the head. I used the sewing machine with a zig-zag stitch to sew on the wings. I need a total of 3 butterfly blocks and I think I'm going to use a different stitch for each block. I haven't decided if I'm going to use white thread and give the butterfly a smiling face.  

Wedding Star Project

Update: I have added the paper piecing pattern for two sizes. The 6 inch block pattern will require four to make a finished 12 inch wedding star block. The 8 inch block pattern will require four to make a 16 inch wedding star block. 

To print the patterns, place mouse over the image, right click and pick "copy image". Paste image in a word document or any other program that offers printing. You may have to adjust to get the gauge to match the actual measurement.


This is the 6 inch pattern, page 1 of 2. I placed a measuring gauge on the page to help with accuracy. Print 4 for each block. 


 This is the 6 inch pattern, page 2 of 2. I placed a measuring gauge on the page to help with accuracy. Print 4 for each block. 


This is the 8 inch pattern, page 1 of 4.  Gauge included for accuracy. Print 4 for each block. 


 This is the 8 inch pattern, page 2 of 4.  Gauge included for accuracy. Print 4 for each block. 


 This is the 8 inch pattern, page 3 of 4.  Gauge included for accuracy. Print 4 for each block. 


This is the 8 inch pattern, page 4 of 4.  Gauge included for accuracy. Print 4 for each block. 


*** end of update, original blog below***


I have seen some wonderful wedding star projects. I haven't had the time to do one, yet, but I hope to do so soon. I did figure out how to make the pattern for it, though.

I plan to use four of the paper pieced sections (8X8 inches) above to create a full block.


 This is a version of a dark background quilt. 


This is a version of a light background quilt. I plan to make my quilts bigger than four full stars. My quilts will have eight to ten full stars wide by eight to ten full stars tall.