Niece's Quilt


I am not the fastest quilter and I doubt that I will ever finish a quilt top in a day. I do piece and I do quilt my quilts, so they take me a bit longer than if I sent them out to be quilted. I enjoy the process and love watching my creations come to life.


Here is my niece’s quilt top. I love making the Attic Window Blocks. I don’t mind the “Y” seams and find them fun. I do like the three dimensional illusion these quilts give the viewer. I had finished the top a while ago and just had not gotten around to the back until now.

I have started on the back and decided to make it a fantasy scene. This is the middle section, a castle. Not sure if it because it is near Halloween, but the castle looks like a spooky face with hands up.  (Notice the tub stained with water paints below the quilt. My niece likes to hang out in my sewing room, and she has been having a lot of fun water painting various boxes.)

I quilted this with big loopy quilts on the machine making it a quilt-as-you-go quilt. When I get the quilt put together with the top, Attic Window, then I will tie the top into the batting layers hopefully missing the back, the fantasy scene.

The bushes were made by sandwiching the purple fabric over batting and then adding a thin backing. Because of the extra batting in the bushes, they puff out just a little. Then I stitched them on like any other appliqué.

The blue in the sky is darker than what I thought it should be. The sky fabric was originally going to be the water section, but my niece liked it and wanted it to be the sky saying it looked stormy. So, being the loving auntie, I caved and did it the way she wanted. The grass seems too light compared to the sky, but that is what she wanted. So when I get around to finishing the back, the water will probably seem too light as well. Oh, what we do for the children in our lives.

I have had people ask why I don’t just put a simple backing on the quilt. I like the idea of reversible quilts and it has become my trade mark.


Basket Liner with Pockets


Needed supplies:
-Fabric (dimensions explained further in the tutorial)
-Lace or binding
-Of course, your basket

Measure your basket around the fullest part. Then add 2 inches for seam allowance and for a relaxed fit. My basket measured 43 ¼ inches. Adding 2 inches made it 45 ¼ inches. I rounded down to 45 inches.

 
Measure the height of the basket, inside and out. My basket measured 5 inches on the inside and 6 inches from the outside.

So to make the basket:
-I will need fabric for the inside liner (45 inches X 6 inches). It will be one piece.
-The pocket fabric will be longer because of needing room for the pockets. I wanted 10 pockets and I didn’t want roomy pockets. I needed one piece (63 inches X 5 ½ inches). This will need to be a little shorter so when you sew the inside liner to the outside liner, the pockets won’t be sewn closed.
-The outside skirt of the basket liner is in two parts so it will fit over the handle (22 ½ inches X 6 inches).
-Then the fabric for the pockets (22 ½ inches X 5 inches). The two pieces are the same measurements because I don’t like the pockets on the outside of the basket to be roomy because things might fall out.

Fold over and press ¼ inch seam on the top of the pocket pieces and stitch to secure.

Pin the sides of the pocket pieces to the sides of the liner pieces. DO NOT align the top of the pocket with the top of the lining or you will sew the pockets shut when you sew the liners together.

When pinning the inside pocket ends to the inside liner, you will have extra fabric between the ends. That is normal and will be used up when making the pockets.

Mark where you want the edge of each pocket to be on the liner fabric. I placed pins every 3 inches. One stitch line will be the division between two pockets.

The blue pins mark the edge of each pocket. The red pins hold the folded section of the pockets, measurement total of ½ inch folded total for each red pin. So each pocket will have an inch extra for the pocket. The yellow pins mark the center of each pocket. They were needed to determine where the folds would occur.

*Alternative method, make gathers before pinning the pocket pieces to the liners. Work the gathers so each pocket is relatively the same size.


Stitch a ¼ inch from the edge on the bottom section of the pockets to secure the folds in place.
 
Sew the sides together with a ¼ inch seam allowance.
 
After the bottom and sides are secured, sew the pocket sides in place. I removed the blue pins and drew a chalk line as a guide. I do not  plan to wash this right away, but use it. If you do not plan to wash the liner, do not use a marking tool that needs to be washed off. Chalk dust can be rubbed off easily.
 
I used a straight stitch because I was going to have light objects (sewing supplies) in the pockets. A zig zag stitch or something different may be needed for heavier supplies (as well as sturdier fabric.) Decorative stitches are always fun.

Secure the outside pockets to the outside lining with basically the same method as above. In my case, the pieces were the same size so I was able to skip the folding of the pockets. The only thing needed was the stitch line that made the pocket divisions.
 
After the pockets are finished, turn the sides of the liner over. Press and stitch in place. Do this to the outside liner with pockets.
You do not have to finish the edge of the inside liner because they will be stitched together creating a finished inside skirt section that is connected all around so no need for ties.
 
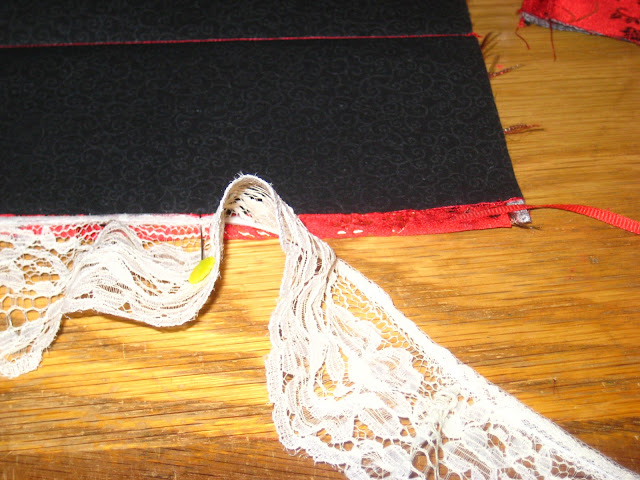
At this point, I trimmed the bottom of the pockets, sightly. Then I attached lace and stitched in place. You can fold over the bottom to finish off if you prefer. I used lace to finish off the bottom of the inside and the bottom of the outside pockets.
 
You can skip this step if you use lace or ribbon to create the ties or if you don’t want any ties at all.

I made my ties by taking a strip of fabric 32 inches by 2 inches. Fold and press so the you have a strip 32 by 1 inch. Open and fold the sides to the center line, press. Fold again so your strip is now 32 inches by ½ inch. Stitch to secure.

Attach the ties at a spot that will look nice on the basket. Stitch in place. I placed the ties at 3 inches from the top so my bow would land about the middle of the height of the basket. Secure on both sides of the outside liners. You should have attached 4 ties.

Secure the ties so they don’t accidentally get sewn down in spots that you don’t want. Yes, I learned this one the hard way.

Pin the top of the outside liner to the top of the inside liner (NOT the pockets or you will sew the pockets shut). You should have pockets facing each other. Stitch in place.

This part is for the inside lining only. Pin right sides together and stitch ¼ seam allowance in place.

Do NOT sew the outside lining or you won’t be able to get this liner on past the handle.

Your liner is now ready for the basket. Insert the inside liner into the inside of the basket. Fold the outside pockets over so they are on the outside of the basket and align the ties so they fall below the basket handles on each side and tie into place.
Ta da!

Here is my basket filled with sewing supplies. I use my old prescription bottles to hold small items that might otherwise get lost.

*Hint, glues last longer if stored upside down. I guess that even a closed lid may allow air into the bottle ever so slightly. By storing glue upside down, the glue helps seal the lid better. Make sure the lid is closed so you don’t spill glue in your new liner or where ever else you might have your glue.

Sweatshirt Tote

My niece didn’t want to give up her favorite sweatshirt, but she had outgrown it. So, we turned it into a tote. The tote is longer than I what I am used to, but my niece did not want to lose any of the image on the front of the sweatshirt.

Supplies needed:
Sweatshirt (makes the outer pocket of tote)
Rectangular fabric 43 inches by 15 inches for outside of inner tote.*
Rectangular fabric 43 inches by 15 inches for lining of inner tote.*
Rectangular batting 41 inches by 15 inches.*

*If only the sweatshirt is used for a simple tote, then only the lining fabric will be needed.


If my niece hadn’t been so insistent, I would have made a straight cut across the top. Instead, I trimmed the top in order to preserve the image. Then I made straight cuts on the sides trying to square up the front of the sweatshirt as much as possible.

 The back was easier. I made straight cuts across the top and down the sides.
We turned her sweatshirt into a three pocket tote. We used black fabric because it matched the outlining on her sweatshirt. After measuring the sweatshirt sections, we cut a piece of rectangular fabric seven inches longer than the top to bottom measurements of the sweatshirt front and the measurements to the top and bottom of the back section of the sweatshirt section.

My niece’s sweatshirt front (measured 19 inches by 15 inches) and back (measured 17 inches by 15 inches) 36 inches by 15 inches. We add 7 inches to the length making our black cloth 43 inches by 15. We also cut a section for the lining (also black) with the measurement s of 43 inches by 15 inches.
Cut batting 41 inches by 15 inches.


Pin batting in the center of the rectangular fabric. Then add the lining fabric on top of the batting. The layer can now be quilted together.


I sewed straight lines to quilt the layers together and even a line to secure the edge of the batting on all sides of the fabric.
Sew bindings on the tops of the front and back of the sweatshirt sections to get a finished edge.

Fold the rectangular fabric layers in half so that the measurements are 26 ½ inches by 15 inches. Press or mark a line on the fold. Measure 2 ½ inches from each side of the fold line and sew the sweatshirt bottoms to each line.

Fold so the sweatshirt pieces are facing each other and pin. Sew up each side. You now have secured the sweatshirts as pockets to the front and back of the tote.
Sew the triangular tips of the bottom of the tote to square off the bottom.
Cut off triangular tips.


Make the handle. My niece wanted one long handle that she could throw over her shoulder. To make a long strap, a strip of fabric was cut 44 inches by 4 inches. Press in half. Open. Fold the sides to the center and press. Now, you can fold so that you now have a strip of fabric that measures 44 inches by 1 inch.


Before attaching the strap, fold over the top of the tote ¼ inch and press. Fold over ¼ inch again and press.


Sew around the edge of the top to secure in place.


Pin the handle over the seam edges. Sew by hand or machine in place. I sewed by hand because it was very bulky.


Turn tote inside out and you now have a finished tote.

Lip Balm Case


This is a quick and easy project. I was able to make two dozen lip balm cases in a couple of hours. The key rings allow them to fit on jacket zippers, back packs, key rings, and even purse zippers. I was able to use a variety of fabrics allowing the recipients to pick the case they liked. This can be given with or without lip balm and is a great project for when something small and inexpensive is needed.
 
Supplies needed:
String/yarn
Key rings
Fabric pieces: 9 inches by 5 inches

Fold long sides of fabric ¼ inch and press.

Fold in half so the 9 inches now measure 4 ½ inches. Press. By having enough fabric to fold over, the inside will be lined. The extra fabric gives some stability to the case as well.

Insert string on fold line and pin in place. Cut the string as long as you need to in order to comfortable tie the ends together. This will be done later in the tutorial. The final length of my string, after tying, was long enough to allow the case to be opened all the way without extra string.

Sew a line ½ inch from the fold to allow the string to have a casing. I used a ¼ inch foot guide to keep the string away from the needle preventing the string from being accidentally sewn to the fabric. You want the string to be able to move so it can close the opening.

Fold the fabric in half so the string sides match up. Do not tie them together yet. Sew the sides together using a ¼ inch seam allowance, but DO NOT sew the string casing shut. Leave that section open.

The fabric is now in the shape of a tube. Turn so the seam is facing up. This will also mean that the strings are now facing up as well. Pin the bottom of the casing flat and sew using a ¼ inch seam allowance.

Turn inside out. You may need to use a stylus. I use a wooden skewer to help invert the case.

Place a key ring on the strings and tie the string ends together. Pulling on the key ring will now shut the lip balm case. Note that a drop of glue will help prevent the knot from loosening.

 Any lip balm the size of a Chap Stick should fit into this case. I even had some lipsticks that would fit, but not all mine would.

Tea Dispenser and Holder

This dispenser holds four Bigelow Tea Boxes. The bottom inch of each tea box is cut open for dispensing the tea bags through the holder.
 

Main Fabric A (cut 1): 12 inches by 18 inches.
Main Fabric B/lining (cut 1): 12 inches by 18 inches.
Main Heavy fusible (cut 1): 11 inches by 17 inches. By cutting the heavy fusible smaller than the main fabric, then bulk is reduced and sewing is easier.
 
Side Fabric A (cut 2): 5 ¾ inches by 3 ¾ inches.
Side Fabric B/lining (cut 2): 5 ¾ inches by 3 ¾ inches.
Side Heavy Fusible (cut 2): 5 ¼ inches by 3 ¼ inches.

Lace and ribbon for closing the front. Buttons and elastic can be used as a substitute for the ribbons and lace.
 
I made five different tea dispensers. This is a shot of two of the different materials used for the sides. The “Princess” fabric was directional and did not work well for the pattern that I created for this dispenser. The brocade fabric worked better as it did not matter what direction the fabric was cut.
 
Layer Fabric A right side out, heavy fusible, and Fabric B right side out. Make sure the fusible is centered and iron in place. Do that for the main section and the two side sections. Sew ¼ inch from the raw edge on the short sides of the main rectangle. Fold and press on the sewn line. Sew each side again to secure the edge down.
 
Determine which end will be the front flap and sew the fold lines into the main section of the fabric on the following measurements from the edge (all measurements are from the front edge):
4 ½ inches
8 ¼ inches
14 inches

*Note that after the line was sewn on the 14 inch mark, then there should be 3 ¾ inches left which will be the bottom side of the dispenser.

Fold and press on the sewing lines.

There should now be definite panels for the front, top, back, and bottom sections on the main rectangle.
 
Add lace or ribbon to the bottom of the front flap for decoration and add approximately 12 inches on each side of lace or ribbon that will tie and close the dispenser.
 
Determine which side sections will be on the right and which will be on the left. Fold a ¼ inch of the side panel that will face the front and sew to secure and to give a finished edge. Sew ribbon or lace to the front of the side flaps at 4 ½ inches from the top to tie to the front flap and keep the dispenser closed.
 
Sew the sides to the main section by lining the back of the side to the back section of the main fabric right sides together. Then sew the bottom of the main fabric to the bottom of the side section. Sew the top of the main fabric to the top of the side section. Note: If you wish to hang your dispenser, then sew the ribbon or lace to the top of the dispenser at this time by slipping it between the side top section and the main top section. Leave the front of the dispenser open for filling. Repeat sewing instructions on the other side of the dispenser. Remember to leave the front panel open for filling on that side as well. Turn so the right side is facing out.
 
Insert the tea boxes into the dispenser. Mark the part of the tea box that will be aligned with the opening of the dispenser. Cut a rectangular opening an inch across the bottom of the cardboard tea box. Align the opening to the opening on the dispenser. Tie the ribbons or lace to close. Hang on hook or leave on counter for dispensing tea.