Main Fabric A (cut 1): 12 inches by 18 inches.
Main Fabric B/lining (cut 1): 12 inches by 18 inches.
Main Heavy fusible (cut 1): 11 inches by 17 inches. By
cutting the heavy fusible smaller than the main fabric, then bulk is reduced
and sewing is easier.
Side Fabric B/lining (cut 2): 5 ¾ inches by 3 ¾ inches.
Side Heavy Fusible (cut 2): 5 ¼ inches by 3 ¼ inches.
Lace and ribbon for closing the front. Buttons and elastic
can be used as a substitute for the ribbons and lace.
I made five different tea dispensers. This is a shot of two
of the different materials used for the sides. The “Princess” fabric was
directional and did not work well for the pattern that I created for this
dispenser. The brocade fabric worked better as it did not matter what direction
the fabric was cut.
Layer Fabric A right side out, heavy fusible, and Fabric B right side out. Make sure the
fusible is centered and iron in place. Do that for the main section and the two
side sections. Sew ¼ inch from the raw edge on the short sides of the main
rectangle. Fold and press on the sewn line. Sew each side again to secure the
edge down.
Determine which end will be the front flap and sew the fold
lines into the main section of the fabric on the following measurements from
the edge (all measurements are from the front edge):
4 ½ inches 8 ¼ inches
14 inches
*Note that after the line was sewn on the 14 inch mark, then
there should be 3 ¾ inches left which will be the bottom side of the dispenser.
Fold and press on the sewing lines.
There should now be definite panels for the front, top, back, and bottom
sections on the main rectangle.
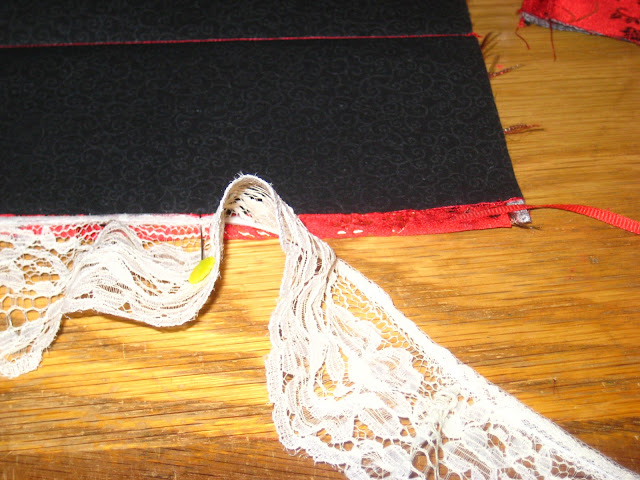
Add lace or ribbon to the bottom of the front flap for decoration and add approximately 12 inches on each side of lace or
ribbon that will tie and close the dispenser.
Determine which side sections will be on the right and which
will be on the left. Fold a ¼ inch of the side panel that will face the front and
sew to secure and to give a finished edge. Sew ribbon or lace to the front of the side
flaps at 4 ½ inches from the top to tie to the front flap and keep the
dispenser closed.
Sew the sides to the main section by lining the back of the side
to the back section of the main fabric right sides together. Then sew the
bottom of the main fabric to the bottom of the side section. Sew the top of the
main fabric to the top of the side section. Note: If you wish to hang your
dispenser, then sew the ribbon or lace to the top of the dispenser at this time
by slipping it between the side top section and the main top section. Leave the
front of the dispenser open for filling. Repeat sewing instructions on the
other side of the dispenser. Remember to leave the front panel open for filling
on that side as well. Turn so the right side is facing out.
Insert the tea boxes into the dispenser. Mark the part of
the tea box that will be aligned with the opening of the dispenser. Cut a
rectangular opening an inch across the bottom of the cardboard tea box. Align
the opening to the opening on the dispenser. Tie the ribbons or lace to close. Hang on hook or leave on counter
for dispensing tea.


Thank you for the tutorial to make the lip balm case. I have been making some for my family members since they live in a very dry province. My lips cracked whenever I go to visit them. This is a great Christmas stocking idea!
ReplyDeletesocialsue