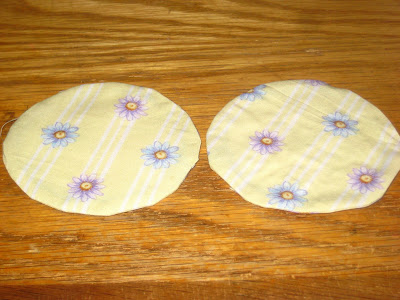
Utensil Pouch Tutorial


This is much simpler than it looks. My niece said it looked like a sleeping bag for the silverware. So think of it like that, just a sleeping bag.

Supplies needed:
Thread
Fabric: Cover, inside, and small border (skip the border if you want.)
Batting
Stiff fusible (skip this is you want a flexible pouch)


You can measure if you want, but I just laid the utensils on the stiff fusible and made cutting marks.


Trim batting to fit one side of the stiff fusible. If you skipped the stiff fusible, then place your utensils on the batting and mark the cutting lines. This is the side that your utensils will lay against.


Cut the piece of the fabric that will be on the inside of the pouch to fit over the fusible and batting. I allowed for about a one inch border on all sides. Cover the batting and turn so the stiff fusible is facing up. The inside fabric should now be on the bottom.


Use a hot iron (per fusible directions) to tack the corners down. Think of how you would wrap a present.


Then tack the ends and sides down. No need to sew just yet. All pieces are fused in place.


Cut the cover fabric so that it is an inch (1/2 inch seams) or 2 inches (1 inch seams) wider than the fabric. The length should be determined by where you want the fabric to stop on the utensils, so add your utensils onto the fusible section and see where they sit.

Make sure the cover fabric covers the entire back of the fusible and even folds over the top of the front section.

I added the border on the cover fabric as well. (Note that the one pictured has two borders. I thought that was too much bulk, so I changed to one border on the later ones.) You can skip the border fabric all together if you wish. 


Turn the cover fabric so that it is right side down facing away from you. Place the fusible piece, right side down on top of the cover fabric. Wrap the cover fabric around to the back and tack into place with an iron (if it will reach the fusible) or glue baste. Make sure the border fabric falls in the spot that you want on the utensils.


Press the sides over so you have one very long piece of fabric. Fold over the visible fusible (the back) and iron into place. You should have a inch or two that will wrap around to the front and show on the top of the pouch.


Turn your pouch over. This photo shows the top unfinished. I wanted you to see that part of it. I haven’t folded the top over the front just yet and you can see the raw edges.

I had about an inch on the top available. So I pressed over ½ inch making it flush against the top of the fusible piece, but did not go over. Then I folded ½ inch again which did make it fold over the top of the fusible piece as shown in the next photo.


Pin or glue baste the top folded section into place. Now your pouch is ready to be sewn.


Sew around all sides 1/8 to ¼ of an inch.


Now you are finished and have a utensil pouch.

Mitered Napkin Tutorial


This is a tutorial for the mitered napkins shown in the photo with the casserole carrier. 

For Casserole Carrier Tutorial go to: 
(copy and past if clicking on the link doesn't work)


Supplies:
Thread
Fabric A (framed fabric) whatever square size you would like your napkin to be.
Fabric B (back of napkin and what creates the frame) will need to be 2 1/2 inches bigger than Fabric A. So if you want a 16 inch napkin, Fabric B will need to be an 18 ½ inch square.

Cut Fabric A to the size that you would like. (14 X 14) (16 x 16) …
Cut Fabric B to Fabric A dimensions PLUS 2 ½ inches.


Take Fabric B and fold over ¼ inch on all four sides. Press.


Then fold over 1 inch on all sides. Press
Each corner of Fabric B should have a small square formed by the pressing. You will use that as a guide later in the tutorial.


Fold Fabric B, right sides together, to form a triangle. Notice the fold lines of the small squares in the corners. Use the small square as a guide. One corner should fold over to the opposite corner. Draw a line from the corners of the small square to the fold of the napkin trying to make a line that forms a 90 degree angle from the fold. Do that to all four corners of Fabric B.


Stitch on the line to form the miter. Make sure right sides are still together.


Clip the corner of the napkins off to reduce bulk.


Turn Fabric B right side out so the mitered corners can be seen. Press the edges flat. Notice that the by folding that ¼ inch in the beginner creates a finished edge to frame Fabric A.


Insert Fabric A into the frame created by Fabric B. It may be easier to turn the frame edges of Fabric B under so that it looks like Fabric B is inside out. Then flip the edges back into place to create the frame after positioning Fabric A.


Press into place to ensure the two pieces fit nicely together.


Sew 1/8 of an inch from the inside frame to secure Fabric A and Fabric B in place.


You have finished your mitered napkins. 

You can make these as simple or as fancy as you would like. I have a friend who is making some rather fancy ones as part of her daughter's wedding gift.

Casserole Carrier Tutorial


This is a tutorial on how to make a casserole carrier for a 9 inch square glass pan. 

For napkin tutorial go to:
http://ponderingcat.blogspot.com/2013/04/mitered-napkin-tutorial.html

For utensil pouch tutorial go to:
http://ponderingcat.blogspot.com/2013/04/utensil-pouch-tutorial.html


I made three casserole carriers and added napkins and utensil pouches.


I made mine bigger than the square pan because they were for my husband to take his lunch to work. 


I made them big enough to also carrier a bottle of water and some fruit.

You will need:
Main fabric
Lining fabric
Fabric for straps (or buy strap fabric)
InsulBright or other insulated batting.
Snaps (4 sets) or other items to close the carrier.


Start by measuring your casserole dish. This one is 11 inches by 9 inches. In this tutorial, I’ll give measurements to fit the casserole carrier without the extra room that I wanted for mine.


The pan is 3 ½ inches deep.

Section A will be a rectangle that will measure 31 inches by 13 inches. Cut 1 main fabric, 1 lining, and 1 batting.

Section B will be a rectangle that will measure 35 inches by 11 inches. Cut 1 main fabric, 1 lining, and 1 batting.

Directions for Section A: Place batting on the wrong side of the lining. Quilt in place. Then place the lining on the main fabric, right sides together. Leave one side open so you can turn the piece inside out when finished. Sew the other three sides using a quarter inch seam.

Repeat with the Section B materials. 


Place Section A over Section B in a “t” shape. Sew in place. I used the square that was created by the crossed fabric. .  Be sure the center each piece against the other.


I used a marking pencil to echo the edges of the sides that I could not see.


Your fabrics should now look like an “x” or a “t”.


Add the handles or make the handles. I cut a strip of fabric 3 inches wide by 68 inches long. I also cut  a strip of batting 1 inch wide by 68 inches long.

Attach the batting down the middle of the fabric strip. Then fold one side over the batting. This should be about a third of the fabric. Then fold the other side over until it meets the batting. Press. Then fold that section over the fabric covering the batting. That should give you a finished edge. Sew into place.


Attach the straps. I marked a line about 2 inches away from the edge of the bottom on opposite sides. Pin on the bottom of the carrier and up the opposite sides about 4 inches. Loop around to the other side of the bottom and pin in place. Check to make sure the loops are the same length. Then sew into place.


Go to the corner of the bottom. Mark a line on Section A 4 inches from the bottom on each of the corners. Then mark a line on Section B also 4 inches from the bottom.


Fold the corners together so the 4 inch marks line up. Pin and sew to make the sides of the carrier.


Add the snaps on the edge corners of each wing of Section A. Make sure to use the tops that correspond to the bottoms. Next, do the same with Section B.


You should be finished.


If you have any questions, feel free to write me. 

The Pouring Jar


This tutorial will show you how to convert a canning jar into a jar that pours. This was not my idea. This was the idea of Rachel Bush and I wanted to share it with you.


You will need:


- a canning jar. In the photo is shown a wide mouth half gallon canning jar. If you use a small mouth jar, you may find that you can skip some of the steps. Also, you can use different size canning jars. Since they tend to use the same size rings, you can move your contents to different jars at later times if you need a different size.

-a salt box or other cardboard box with a pour spout.

-hot glue gun


Start by opening the salt container carefully. Using the lid of the canning jar as a template, trace around the lid on the side of the box so there are no fold seams. Also, trace around the spout.
In the photo above, notice that the spout section doesn’t cover a complete circle. That is okay. 

*If you use a small mouth jar, you may only need to trace carefully around the spout. You might be able to skip the prep of the circle section of cardboard completely. Just make sure the spout has enough cardboard to make a snug fit so the contents don't spill out and that pests cannot get in.


Cut out the circle and the spout. They will be too large to fit into the canning ring. Trim the circle section carefully until it will snap into the ring section. It should not fall out or be too loose. To check, add a teaspoon of salt (or whatever will be kept in this jar) and tighten the ring with the cardboard in place. Turn the jar upside down. None of the contents should fall out. This will help prevent pests from getting into your jars. 

Gently remove the circle so the spout section can be cut.

*Leave the salt (or other contents) in the jar. You will use it to test the seal later.


Measure the spout. This one measured an inch and a quarter tall (include the cardboard section below the spout.) It was about three quarters of an inch wide. Mark those measurements onto the back of the circle cardboard section.


Cut out the section. Then mark the glue line. I left plenty of space between the cut section and the hot glue mark.  I wasn’t sure how it would fit. Next time, I won’t use such a wide space.

Glue along the lines and affix the spout so it is facing out. In this tutorial, it won’t matter if the spout opens on the colored part of the cardboard or the back.


I had the spout so that it poured so you could see the blue color of the salt box because this canning jar will hold salt. Next time, I may have the cardboard section facing out and write the contents of the jar on the cardboard.


 Insert the circle cardboard section back into the ring of the canning jar. Then screw the ring onto the canning jar. Keep the spout closed and turn upside down. (You should have left the salt in the jar, if not, add a teaspoon back into the jar.) You should not have any leaks. This helps prevent pests from getting into the jar.


Now you have a pouring jar.

Microwave Mug Cozy


This mug cozy is designed to go into the microwave with the mug. This should keep hands from being burned.

There is nothing shiny or metallic in or on the fabric or batting. Ribbons were used instead of any buttons just in case there was a problem with the button in the microwave.


Measure the width around the mug. This measured almost 10 ½ inches. So the length of the fabric will be 11 ½ inches.


Measure the height of the mug. This one measured almost 4 inches. So the fabric will be have a width of 4 ½ inches. I’ll still use the one inch seam allowance, but this will allow a little bit of the mug showing above the fabric.


Use the mug as a template. Trace around the base of the mug onto the batting. (Because this batting will go into the microwave, DO NOT USE any insulated batting. Use only 100% cotton batting.) Cut approximately ½ inch bigger than the traced circle. Cut one for each cozy. (Use two if you feel that you will need the extra batting for heat protection.)

Cut batting to fit the exact measurements of the mug. Do not add seam allowances. This reduces bulk as you sew. For this project, I cut only one rectangular section of batting. If you feel that you need to, cut two for added protection for your hands.

Cut two (inside and outside of the cozy) pieces of rectangular strips of fabric the circumference of the mug by the height of the mug. For the mine, I cut the strips 11 ½ by 4 ½ inches.

*I made two cozies. So if you look closely, you will see 2 each of the batting and 4 each of the fabric sections.


Pin and quilt batting into place onto the wrong side of one of the corresponding fabric pieces. I cut the circles out with seam allowances later in the tutorial.


I did a very simple quilting job, just enough to keep the batting into place. For the rectangular pieces, I quilted three lines. (Top, bottom, and middle of the batting.) For the circles of batting, I quilted an “X” and then around the circle on the traced pattern to keep the batting in place.


Place the quilted pieces onto the corresponding fabric pieces wrong sides together. Pin in place.


Start with the circle batting. Sew three quarters around the circle leaving an opening so it can be turned inside out. Allow 1/8 to ¼ of space between the stitch line and the edge of the batting. This reduces bulk and makes for easier manipulation of the pieces.


For the rectangular section of fabric, sew alone the top and bottom with ¼ of a seam allowance. You should not catch the batting in this stitch. Again, this reduces bulk and allows for easier manipulation of the fabric.


Turn the circle piece inside out. Fold the fabric in the open edge so that it conforms to the circle, press or iron so the fabric stays folded. Tack with glue or pin the fabric into place to complete the circle.


Turn the rectangular piece inside out. Fold ¼ inch under at the opening so that you will have a finished edge after sewing. Do not sew at this time. You will need to add the ribbons first.


Add ribbon at the top and middle of the cozy. You may wish the ribbons to be longer than you think that you might need. You can trim them later. These will tie the cozy closed and keep it wrapped around your mug. Tuck the ribbon between the folded edges at the ends of the cozy. Make sure that you are placing the ribbons at the spot that will be the top and middle. Tack or pin into place.


Sew the ends of the cozy closed with 1/8 inch seam allowance making sure to secure the ribbons in place with the stitching.


Secure the ribbons out of the way so they will not inadvertently get caught and sewn into the wrong places. I used a binding clip and secured the ribbon to the top section of the cozy.

Pin the circular bottom to the cozy wrap section with the outside sections together. Think about what you want to see on the outside of the mug. Then make sure that section of the bottom and the side are facing each other as you sew. Sew into place.


Turn the cozy inside out. Now the fabric sections that you wanted outside should be facing outside. Tie knots on the edge of the ribbons to prevent unraveling. Trim the ribbons now if you wish to do so.


The cozies are now complete. You have a cozy that wraps around the sides and bottom of your mug and prevents your hands from getting burned.