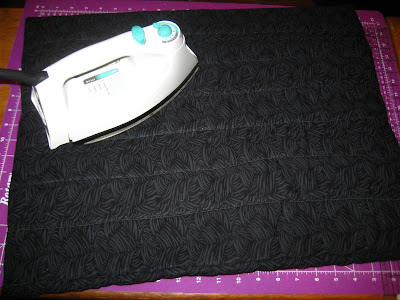
Here is a tutorial on how to create your own portable ironing pad. This is for those smaller projects that you don’t need a full size ironing board. This also recycles an old car sun shield.
For this project you will
need:
Fabric
Insulbright or other
insulating batting
Extra regular batting
A car sun shield with a
center of foam, not the bubbles.
First determine how big you
would like your pad to be. I decided to have one for my quilting blocks. So I wanted 17 X 22 inches. Cut the
insulbright and batting to 17 ½ inches by 22 ½ inches. Cut the fabric to 38 X 23 inches.
Press 1 inch fold on the 17 ½
inch sides. Then fold over another 1
inches on each of those sides. Iron and sew. This will give you the finished edge after everything is
sewn.
Lay the insulated padding
against the wrong side of the fabric. Make sure to position the padding so that it
will be in the correct position after the other side is folded over so the
finished edges meet.
Then place the other batting
over the insulated batting. Pin and quilt both battings into place.
Fold the fabric in half so
right sides are together. Pin marking the 17 1/2 inch side to remind you NOT to sew them shut. I differed the pin positioning and also added red pins to remind me not to sew that side shut.
Sew the other three sides. I did add a line of stitching on the fold to ensure that the batting stayed in place and didn't creep in future use.Trim away excess bulk.
Turn the ironing pad inside out. Slip the car sun shield
inside making sure the shiny side is facing up. This will prevent steam from
getting to your table.
I suggest that this side be left open so you can remove the
sun shield for washing or if you need to add a different sun shield after wear
and tear. If you really feel the need to close it, then I suggest using a few
tacking stitches that can easily be removed.
Now you have a finished ironing pad that you can use on a
table or desk for smaller projects. I have washed this on gentle in the washer
and it has held up fine. I will safety pin the open side closed next time, though because a sock
got trapped in it.


No comments:
Post a Comment