Converting Recycled Bags into Totes


This project was a way to use food bags and turn them into totes. We buy a lot of pet food and I wanted a way to use the bags in a fun project. I also used the big bag of M&M’s for a small snack bag type of thing. I gave it to my niece after having filled it with her favorite candies.


Start by trimming your bags in a way that you can clean any food residue that may be on the inside. 


After cleaning the food bags, measure the length and width of the bags. Make sure to cut the lining fabric with a comfortable seam allowance. On some projects, I will use a quarter inch seam allowance, a half inch seam allowance, or even an inch seam allowance. On this project, I used half an inch on the sides and an inch on the top so I could fold the lining to the outside to create a half inch trim at the top of the tote bag.

Pin the sections, with the right sides together so that the lining is the only thing showing. You should not see the recycled bags.


On these, I started at the top of one side, sewed down the side, across the bottom, and up the other side. Then I dog-eared the bottom.


Take the inch of fabric at the top of the tote and fold over ½ inch and press. Then repeat so that there is a half in binding at the top of the tote.


For the handles, I used a three inch wide piece of fabric. Determine the required length of the handles, include the amount that you will use to secure the handles to the bag and multiply by 2. (I was making so many bags that I just cut a couple of long 3 inch strips and cut off what was needed.)

For comfortable handles, add a one inch wide strip of batting in the center of the strip. Secure in place.

This is one of those places that if you have a favorite way of making handles, then use the tried and true method.


Fold one side of the strip over and press. Fold the remaining side so the edge will be finished and press. Make sure you fold it so that it will cover the batting completely. Fold over the batting and press. I folded my handles in a way so that my stitches would run down the middle of the handles. On some of the handles, I used a strait stitch. On others, I used some of my decorative stitches.


Position the handles so that the stitches that secure the binding will also secure the handles. If you plan to use your tote for heavy items, sew the handles in a way that can hold the weight. Some use an “X” shaped stitching pattern to add strength.


Here is an image so that you can see how the handles are attached to the bags. For what we carry in the bags, this will be strong enough. Otherwise, I would have secured them in a manner to hold the extra weight. No need in having anything break because the handles failed to remain attached to the bag.


 Here are the finished bags. The pet bags are made from a metalized plastic. So if they need washed, they could be washed on a gentle cycle. Because they are a plastic, they cannot be placed in the dryer.

The M&M’s bag is just plastic. If it needs washed, it will be hand washed and then allowed to air dry.

Have fun sewing!

Kitty Bunk Beds, Using an old object in a new way.


This is not a tutorial, but I wanted to share one of my projects with you. It is the cats’ bunk beds. The top reminds me of a bassinet.  The bottom is much like a canopy bed with curtains. I also made the bed on the bottom with high walls and a front opening so the cats can feel hidden and cozy.


It started with an old printer stand that hasn’t been used in quite a while. I decided that we needed to use it or get rid of it. So I turned it into something the cats can use.


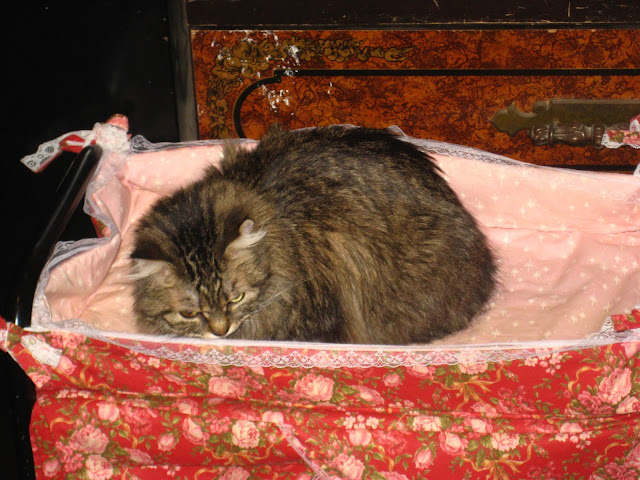
Here is our daughter, Mystique using the top bunk. 

Skirted Plastic Pails


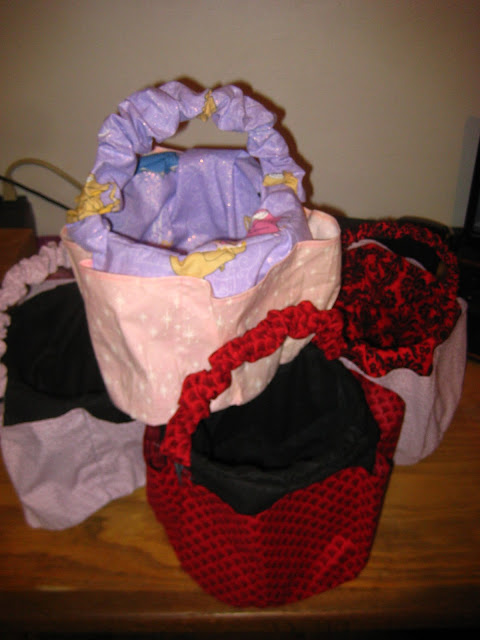
I enjoy making liners for wicker baskets or pails of any type. For Easter this year, I covered ice cream buckets with pocketed liners and filled them with candy. I did not use the traditional Easter themed or spring themed fabrics. I tried to pick out colors that the recipient would like so they could use the bucket for other things after the Easter holiday. By using plastic ice cream buckets, the recipient could use it for bathroom toiletries and not have to worry about the water. This is also a nice way to recycle those buckets.


I start by using the lid as a template for the bottom piece of fabric for inside the bucket. You don’t need to do this. I like the look of the bucket with a bottom liner. If you do not wish to use the circle fabric as a liner, remember to finish the inside hem of the skirt.


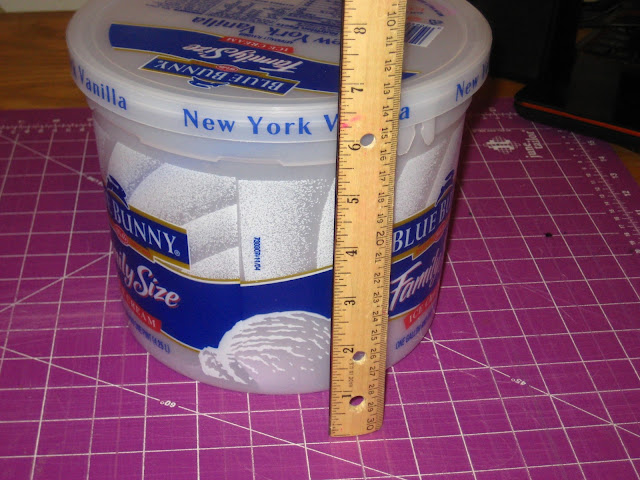
Next, you will need to measure around the widest part of the bucket. For this ice cream pail, the widest part was the top. This measured to 26 inches. I added two extra inches for seam allowances and for a bit of extra give. If you wish to have a more fitted skirt, then just add the seam allowance.


The height of the bucket determines the length of the skirt. This measured almost 7 inches and I added one extra inch for the seam allowances.


The resulting pieces will be:
1 circle liner to cover the bottom of the bucket (optional)
1 rectangular piece of twice the length of the handle by 3 inches* (optional)
1 rectangular piece of fabric 28 inches by 8 inches for the skirt inside the bucket
2 rectangular pieces of fabric 14 inches by 8 for the outside skirt back
2 rectangular pieces of fabric 21 inches by 8 inches for the pockets of the skirt**

*For these baskets, since I used scrap fabric, the handle pieces did not always measure to twice the length or by 3 inches. Make sure you have enough so you can turn the handle piece inside out.
**For these baskets, I used a lot of scrap fabric and the pockets did not always measure 21 inches. It just created pockets that were not so full or as big.


Start with the outside pocket fabric and determine where the top will be and fold over ¼ inch and press. Then turn over another ¼ inch and press again.


Stitch in place.


For the bottom of the pocket, sew gathers or just fold fabric to create the pockets. I used a zig zag stitch over a separate thread to create the gathers. Dental floss can also be used. I find it easier to see the gather stitches and thread if they are different colors. Sew to secure gathers or pin the folds to the back of the pockets. Lay the front pocket fabric wrong side to the right side of the back of the pocket.


Sew the bottom of the pocket piece to the bottom of the backing piece. I used my quarter inch foot to help keep the  stitching straight with the edge of the fabric.


To create the pockets, pin the pocket fabric in place and mark where you want the pockets to start and stop. I sewed between the rows of pins to make the pockets. Then press the edges over ¼ inch (sides) and sew in place to finish the pocket sections of the liner.


Sew the pockets to the inner lining by turning right sides together. I find it easier to fold the inner liner and use the fold mark as an indicator of where the handle will be. Then I sew the pocket top to the liner top, right sides together by placing the pockets about ¼ to ½ inch away from the fold on both sides. This is a good time to check that the pockets are placed on correctly by turning them the way they will face on the bucket. The wrong sides should be together after turning and the pockets should be facing out.
Pin and sew the inner lining by sewing the 8 inch sides together (wrong sides together). This should now create a tunnel or skirt for the inside of the bucket.  


Pin the circle, right side, to the inner skirt, right side. You will want to see the right side of the fabric in the bottom of the bucket.


Sew the circle lining to the inner skirt.


For the gathered handles, fold the ends over ½ inch (wrong sides together) and press. Sew in place.


Fold the 3 inch width strip (right sides together) so that it is 1 ½ inches. Press and pin. Sew in place. Turn so the right side is facing out. Thread it onto the handle (this should snap off) and allow it to gather as you go. Snap the handle back onto the bucket.


You are finished and ready to use the buckets.


The Girl's Growing Up Box


This is a tutorial of a simple covered box. There is no sewing involved. You will need fabric, Elmer’s Glue, a hot glue gun, batting, a cardboard shoe box, and notions for decorating.


This is called the “Girl's Growing Up Box” because it is made for my niece who is growing up. It is filled with feminine hygiene supplies. It will also have a book about a girl’s changing body and there will be some chocolates as well.

I made one for my first niece as well. The most surprising thing she said was that she appreciated the book the most. It gave her a lot of information that she had questions on, but had been too embarrassed to ask. 


First, start by covering the outside part of the lid and the inside part of the bottom of the shoe box with batting. Do this by spreading Elmer’s Glue in a thin layer over the cardboard. It is helpful to use something to smooth out the glue or you will be able to feel the beads or raised line of glue after it dries. You can use a fast drying glue as well. Let the glue dry and set.

You may want to use pins to secure the batting until the glue dries. In places that batting is not used, clothes pins may be used, otherwise the clothes pins may form dips or impressions in the batting.


Then cover the outside of the bottom of the box and the outside of the top of the box with fabric. Use the Elmer’s Glue the same way as you did in the previous step. Make sure to smooth the glue to prevent bumps after drying. Allow the glue to dry and set. I use clothes pins in to hold the fabric in place because I put this fabric on before putting on the inner batting.


Cover the inner part of the lid with fabric by spreading a thin layer of glue over the top. Make sure the edges of the fabric are long enough to fold over onto the outside of the lid. If there is too much bulk from glue and fabric on the inside of the lid, it will be difficult to close.


Once you have glued the batting and fabric to cover the box, inside and out, then use lace, ribbons, or other notions to cover the seams. I used hot glue to secure the lace over the seams.

The box is basically finished. This lid was too plain to go with the rest of the box. So I added more lace and ribbon to the top of it with hot glue.


Here is the finished box ready for use.