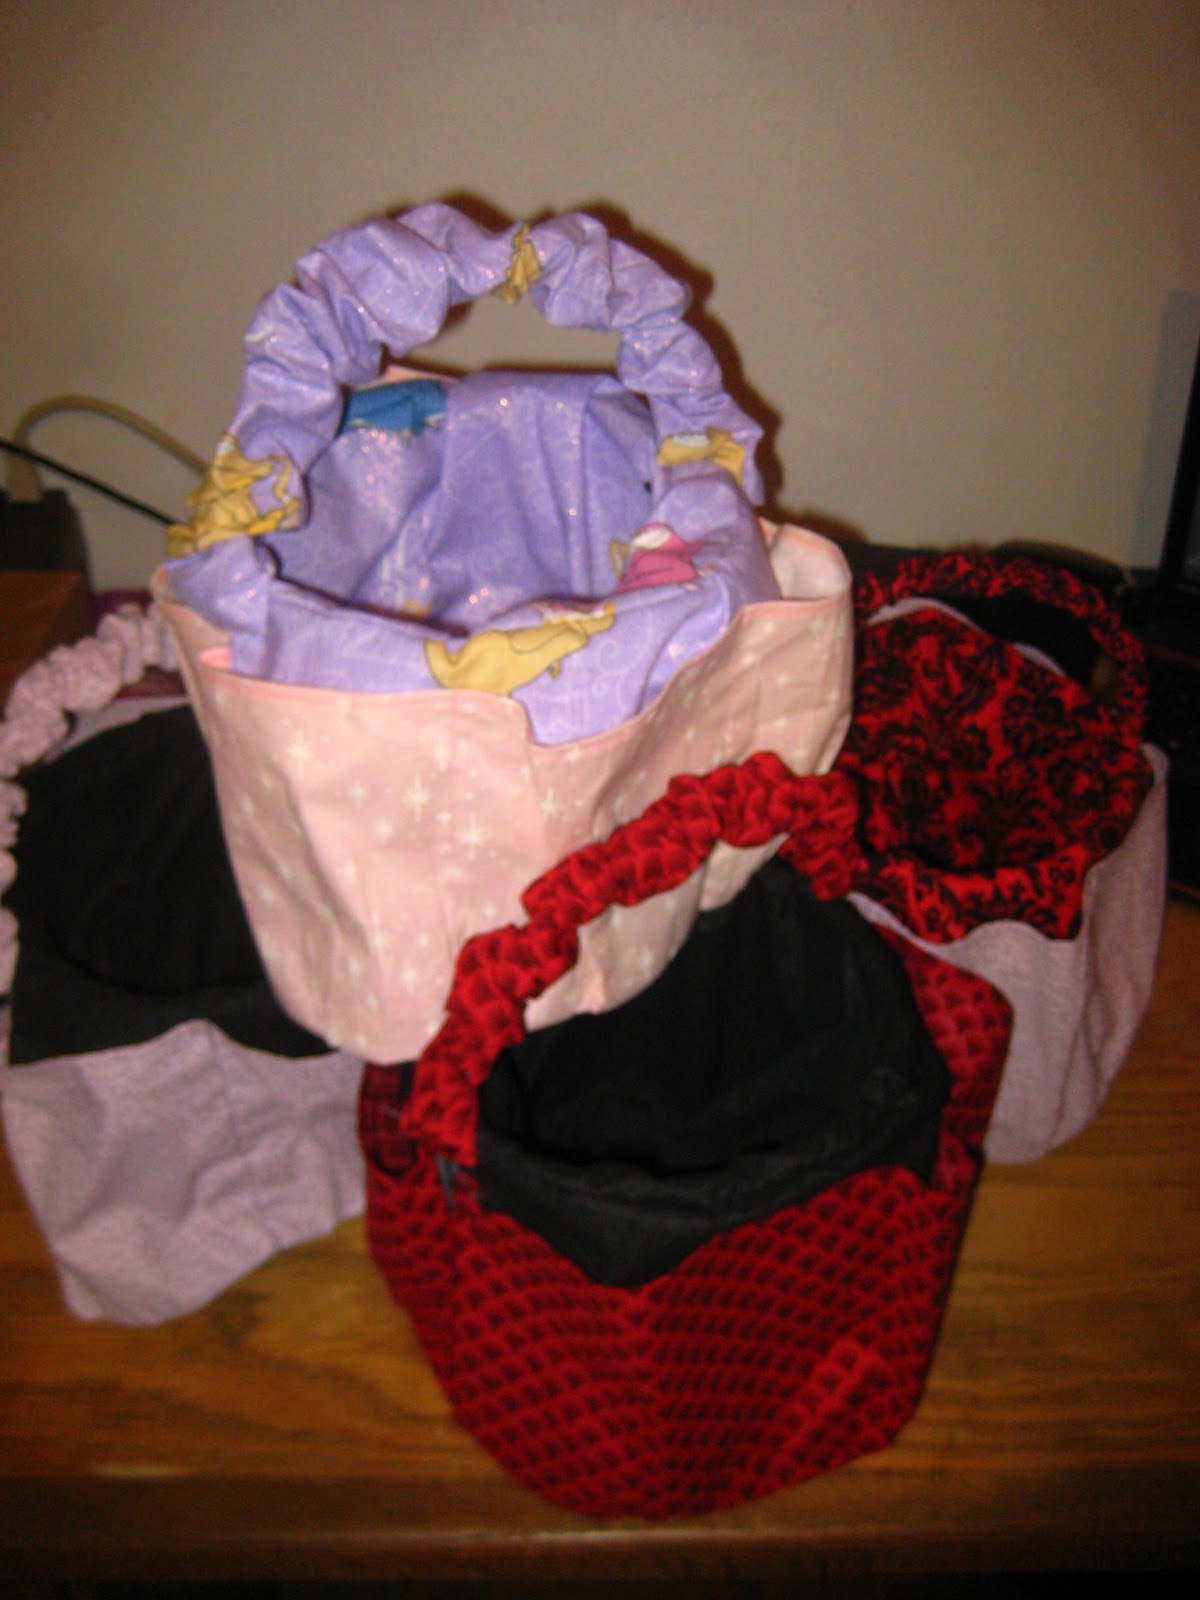
I enjoy making liners for wicker baskets or pails of any
type. For Easter this year, I covered ice cream buckets with pocketed liners
and filled them with candy. I did not use the traditional Easter themed or
spring themed fabrics. I tried to pick out colors that the recipient would like
so they could use the bucket for other things after the Easter holiday. By using
plastic ice cream buckets, the recipient could use it for bathroom toiletries
and not have to worry about the water. This is also a nice way to recycle those
buckets.

I start by using the lid as a template for the bottom piece
of fabric for inside the bucket. You don’t need to do this. I like the look of
the bucket with a bottom liner. If you do not wish to use the circle fabric as
a liner, remember to finish the inside hem of the skirt.

Next, you will need to measure around the widest part of the
bucket. For this ice cream pail, the widest part was the top. This measured to
26 inches. I added two extra inches for seam allowances and for a bit of extra
give. If you wish to have a more fitted skirt, then just add the seam
allowance.
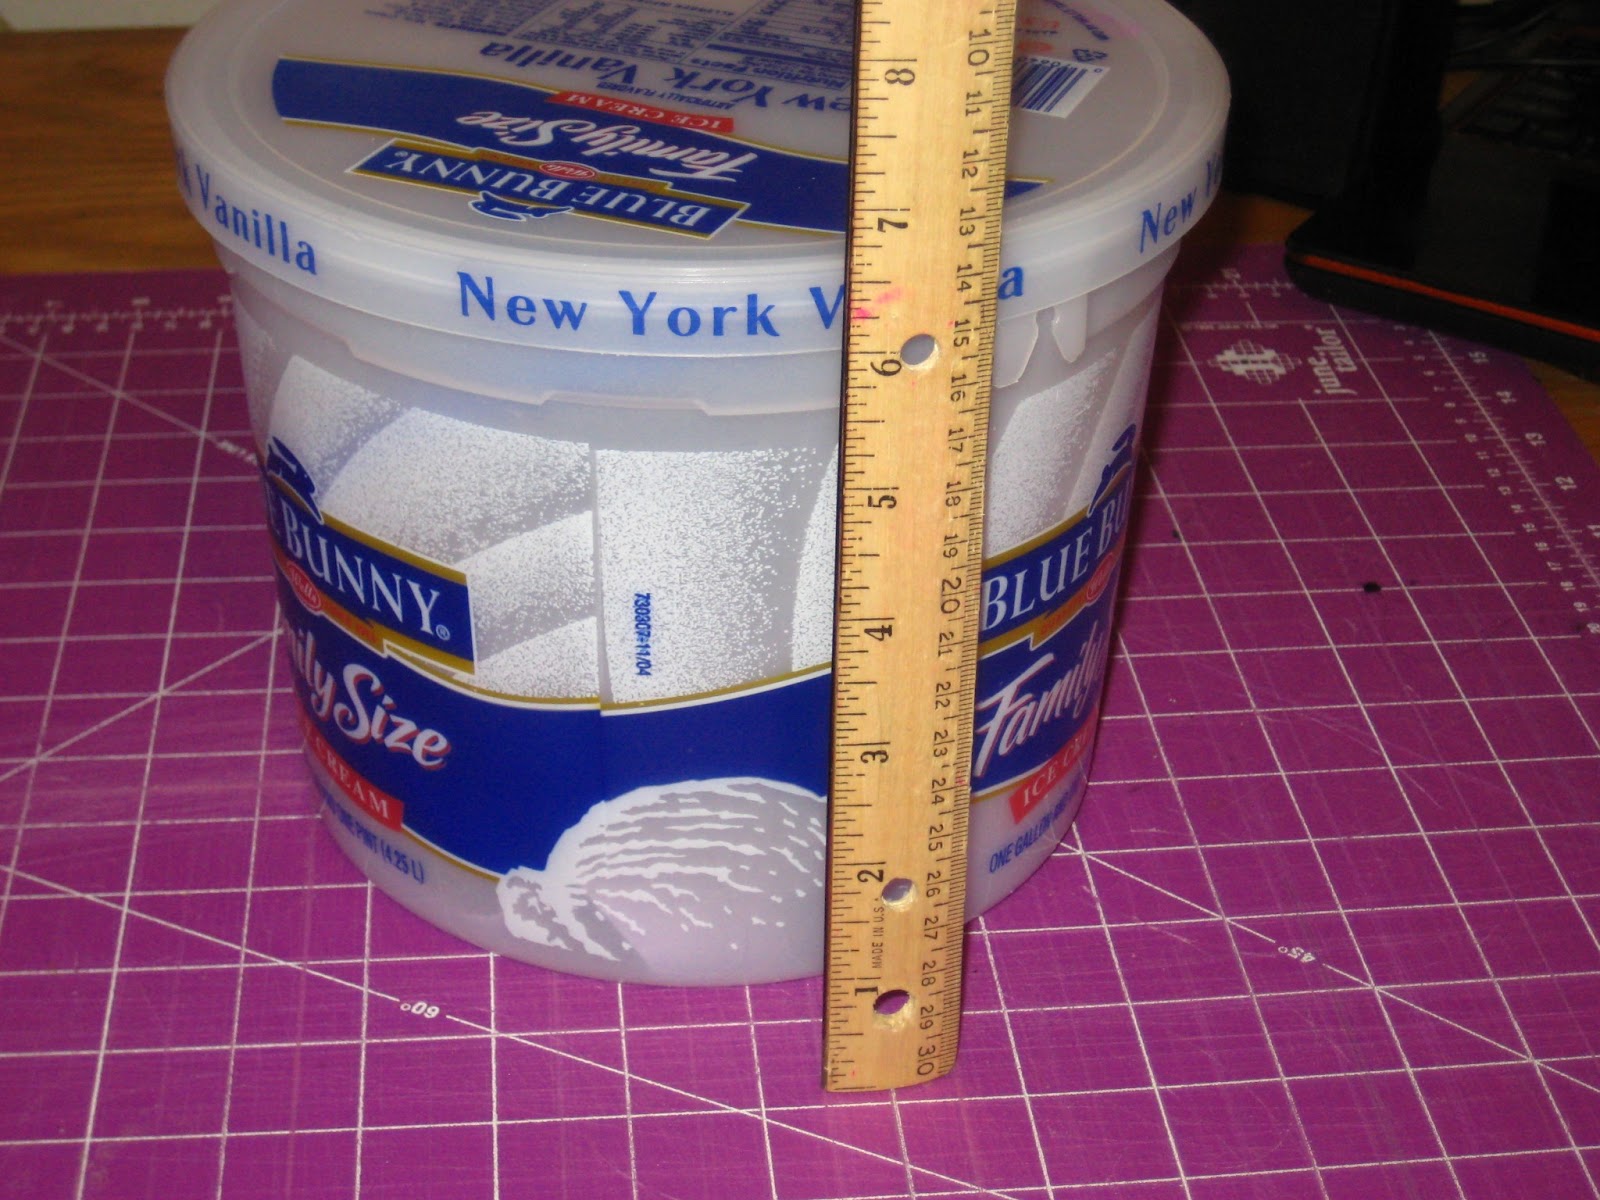
The height of the bucket determines the length of the skirt.
This measured almost 7 inches and I added one extra inch for the seam
allowances.

The resulting pieces will be:
1 circle liner to cover the bottom of the bucket (optional)
1 rectangular piece of twice the length of the handle by 3
inches* (optional)
1 rectangular piece of fabric 28 inches by 8 inches for the
skirt inside the bucket
2 rectangular pieces of fabric 14 inches by 8 for the
outside skirt back
2 rectangular pieces of fabric 21 inches by 8 inches for the
pockets of the skirt**
*For these baskets, since I used scrap fabric, the handle
pieces did not always measure to twice the length or by 3 inches. Make sure you
have enough so you can turn the handle piece inside out.
**For these baskets, I used a lot of scrap fabric and the
pockets did not always measure 21 inches. It just created pockets that were not
so full or as big.

Start with the outside pocket fabric and determine where the
top will be and fold over ¼ inch and press. Then turn over another ¼ inch and press
again.

Stitch in place.

For the bottom of the pocket, sew gathers or just fold
fabric to create the pockets. I used a zig zag stitch over a separate thread to
create the gathers. Dental floss can also be used. I find it easier to see the
gather stitches and thread if they are different colors. Sew to secure gathers
or pin the folds to the back of the pockets. Lay the front pocket fabric wrong
side to the right side of the back of the pocket.

Sew the bottom of the pocket piece to the bottom of the
backing piece. I used my quarter inch foot to help keep the stitching straight with the edge of the
fabric.

To create the pockets, pin the pocket fabric in place and
mark where you want the pockets to start and stop. I sewed between the rows of
pins to make the pockets. Then press the edges over ¼ inch (sides) and sew in
place to finish the pocket sections of the liner.

Sew the pockets to the inner lining by turning right sides
together. I find it easier to fold the inner liner and use the fold mark as an
indicator of where the handle will be. Then I sew the pocket top to the liner
top, right sides together by placing the pockets about ¼ to ½ inch away from
the fold on both sides. This is a good time to check that the pockets are
placed on correctly by turning them the way they will face on the bucket. The
wrong sides should be together after turning and the pockets should be facing
out.
Pin and sew the inner lining by sewing the 8 inch sides together
(wrong sides together). This should now create a tunnel or skirt for the inside
of the bucket.

Pin the circle, right side, to the inner skirt, right side. You
will want to see the right side of the fabric in the bottom of the bucket.

Sew the circle lining to the inner skirt.

For the gathered handles, fold the ends over ½ inch (wrong
sides together) and press. Sew in place.

Fold the 3 inch width strip (right sides together) so that
it is 1 ½ inches. Press and pin. Sew in place. Turn so the right side is facing
out. Thread it onto the handle (this should snap off) and allow it to gather as
you go. Snap the handle back onto the bucket.

You are finished and ready to use the buckets.
Nice!
ReplyDeleteI noticed ice cream pails in our grocery store are getting smaller, some brands. I use them for light duty chore pails and they are not as tough as in the past. They sell deli pails from food products for $1 or more at the grocery store, a good price and handy. Love your project!